Introduction
In this article we will show you how to integrate the Control Panel's installation code page and the chat volume page into Vincall.
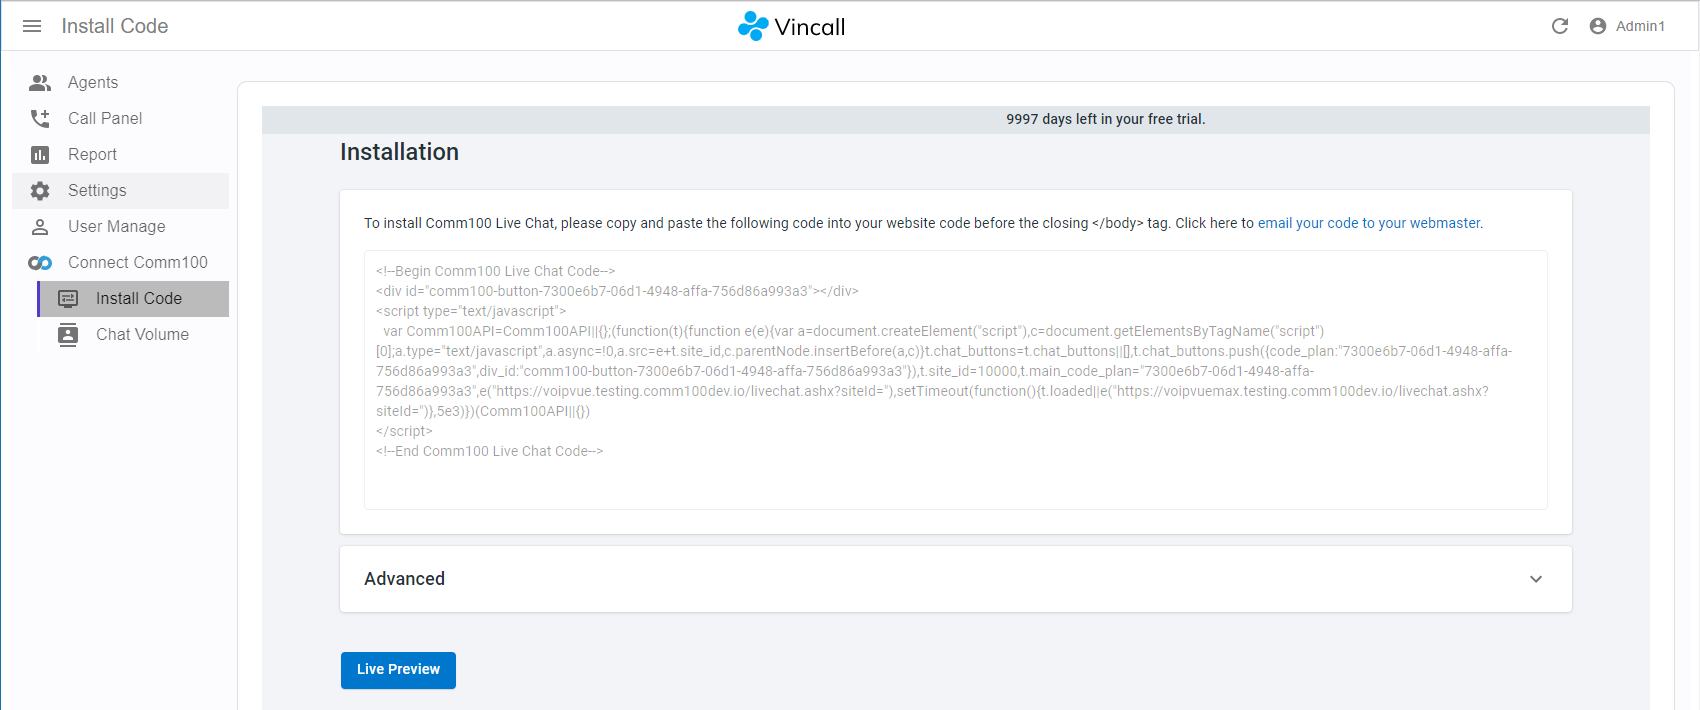
Integrate installation code page in Vincall:
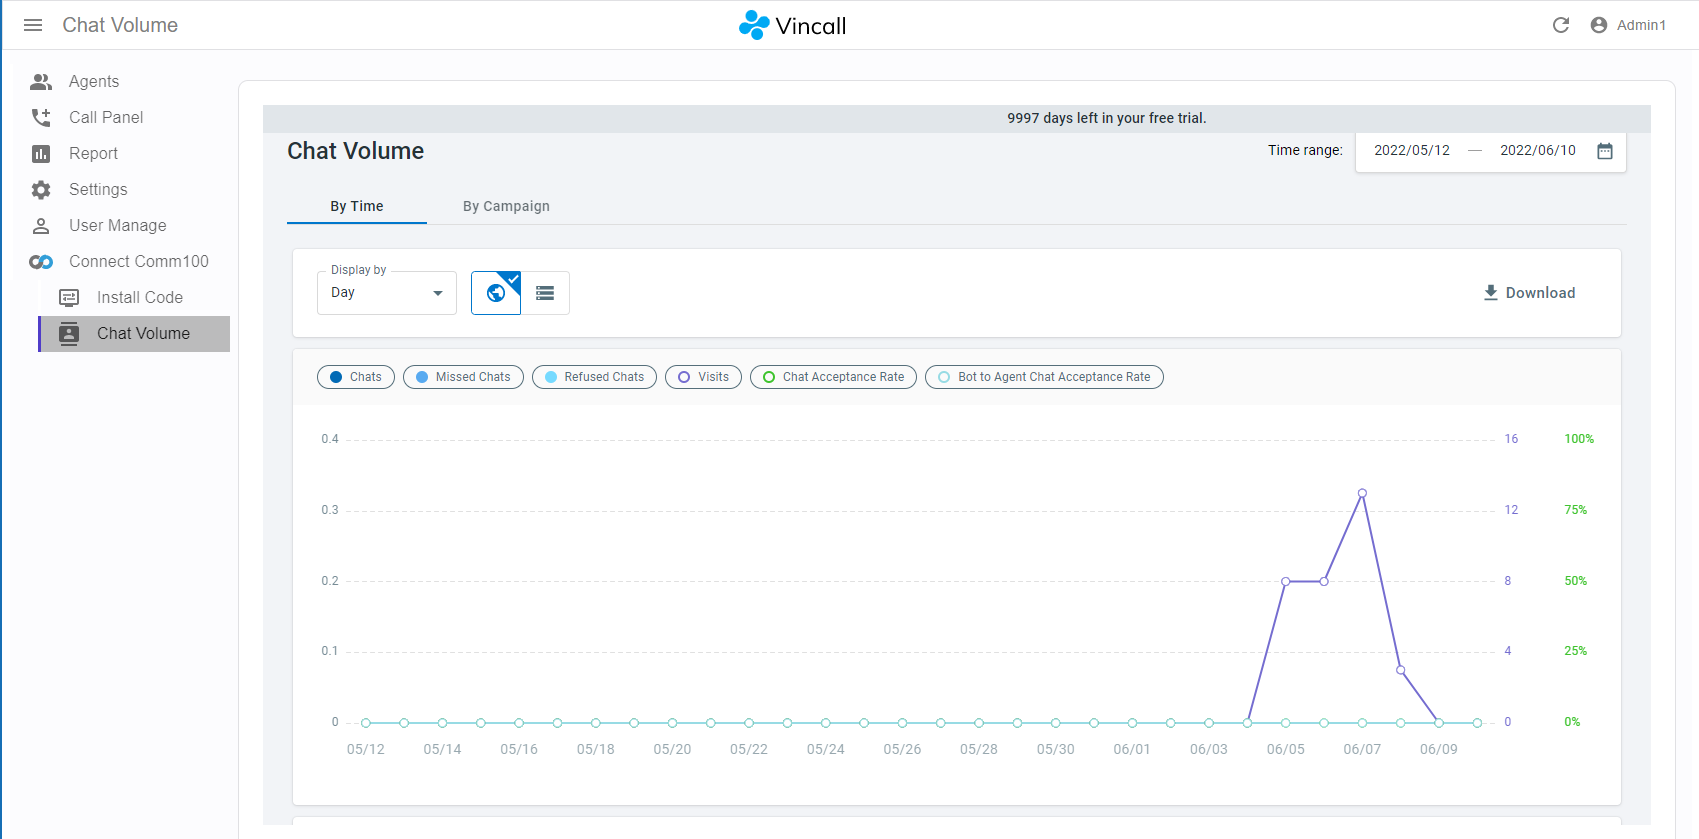
Integrate chat volume page in Vincall:
Step-by-Step Instructions
We can embed the Control Panel's page into our own system via Comm100 Embedded Client. Let's step by step implement the integration of different pages into Vincall:
- Adding the New Page in Vincall
- Embedding Comm100 Control Panel vir Embeddable SDK
- Adding the Chat Volume Page
Adding the New Page in Vincall
- Create new page ControlPanel.tsx (src/Pages/Comm100/ControlPanel.tsx):
export interface ControlPanelProps {
  title: string;
}

export const ControlPanel = ({ title }: ControlPanelProps) => {
  return (
    <Card sx={{ p: 3, mt: 3 }}>
      <Title title={title} />
      <div
        id="comm100-controlpanel-install-code"
        style={{ width: "100%", height: "720px" }}
      ></div>
    </Card>
  );
};
- Add new route in src/App.tsx:
<CustomRoutes>
  <Route
    path="/installcode"
    element={<ControlPanel key="Install Code" title="Install Code" />}
  />
</CustomRoutes>
- Add new menu in src/Layout/Menu.tsx:
<CMenuItem
  to="/installcode"
  label="Install Code"
  icon={<DisplaySettingsIcon sx={{ fontSize: "24px !important" }} />}
/>
Launch the project, click on the Install Code menu or visit the http://{youdomain}/#/installcode URL to access the new page. But the page is still empty, we need to move on to load the installation code page in src/Pages/Comm100/ControlPanel.tsx.
Embedding Comm100 Control Panel vir Embeddable SDK
We need to embed the following code into the new page to load the installation code page:
<div
  id="comm100-controlpanel-install-code"
  style="width:100%; height: 720px"
></div>
<script src="https://static.comm100.io/sdk/comm100-embeddable-sdk-v1_0_0.js"></script>
<script>
  var controlPanel = new EmbeddedControlPanel({
    appId: "{YOUR_APP_ID}",
    siteId: { YOUR_SITE_ID }, // Your site id
    entry: "/livechat/campaign/installation/", // The path to the installation code page in comm100
    container: document.getElementById("comm100-controlpanel-install-code"),
  });
  controlPanel.init();
</script>
Load the above code in src/Pages/Comm100/ControlPanel.tsx page:
export interface ControlPanelProps {
  title: string;
}

export const ControlPanel = ({ title }: ControlPanelProps) => {
  useEffect(() => {
    return install();
  }, []);

  return (
    <Card sx={{ p: 3, mt: 3 }}>
      <Title title={title} />
      <div
        id="comm100-controlpanel-installcode"
        style={{ width: "100%", height: "720px" }}
      ></div>
    </Card>
  );
};

function install() {
  let s2: any;

  const s = document.createElement("script");
  s.src = `https://static.comm100.io/sdk/comm100-embeddable-sdk-v1_0_0.js`;
  s.async = true;
  s.onload = () => {
    s2 = document.createElement("script");
    s2.innerHTML = `
        var controlPanel = new EmbeddedControlPanel({
          appId: "{YOUR_APP_ID}",
          siteId: {YOUR_SITE_ID},
          entry: "/livechat/campaign/installation/",
          container: document.getElementById("comm100-controlpanel-installcode"),
        });
        controlPanel.init();
  `;
    document.body.appendChild(s2);
  };
  document.body.appendChild(s);
  return () => {
    if (s && s.parentNode) {
      s.parentNode.removeChild(s);
    }
    if (s2 && s2.parentNode) {
      s2.parentNode.removeChild(s2);
    }
  };
}
At this point, the installation code page has been embedded in Vincall. After Connecting to a Comm100 account and Mapping the Agents, installation code page will load successful in Vincall.
Adding the Chat Volume Page
Next, we'll continue to add the chat volume page to Vincall.
It's almost the same as adding the Install Code page. Just provide a different entry when initializing EmbeddedControlPanel:
<script>
  var controlPanel = new EmbeddedControlPanel({
    appId: "{YOUR_APP_ID}",
    siteId: { YOUR_SITE_ID }, // Your site id
    entry: "/reporting/livechat/chatvolume/chatvolumebytime/", // Path of chat volume page
    container: document.getElementById("comm100-controlpanel-chat-volume"),
  });
  controlPanel.init();
</script>
- Modify the
installfunction (src/Pages/Comm100/ControlPanel.tsx) to embed a different Control Panel page.installfunction will receive two arguments:
entry: The path to Comm100 pageelementId: Specifies the container element for the embedded page
function install(entry: string, elementId: string) {
  let s2: any;

  const s = document.createElement("script");
  s.src = `https://static.comm100.io/sdk/comm100-embeddable-sdk-v1_0_0.js`;
  s.async = true;
  s.onload = () => {
    s2 = document.createElement("script");
    s2.innerHTML = `
        var controlPanel = new EmbeddedControlPanel({
          appId: "{YOUR_APP_ID}",
          siteId: {YOUR_SITE_ID},
          entry: "${entry}",
          container: document.getElementById("${elementId}"),
        });
        controlPanel.init();
  `;
    document.body.appendChild(s2);
  };
  document.body.appendChild(s);
  return () => {
    if (s && s.parentNode) {
      s.parentNode.removeChild(s);
    }
    if (s2 && s2.parentNode) {
      s2.parentNode.removeChild(s2);
    }
  };
}
So src/Pages/Comm100/ControlPanel.tsx file should be updated like this:
export interface ControlPanelProps {
  title: string;
  entry: string; // The path to Comm100 page
  elementId: string; // Specifies the container element for the embedded page
}

export const ControlPanel = ({
  title,
  entry,
  elementId,
}: ControlPanelProps) => {
  useEffect(() => {
    return install(entry, elementId);
  }, []);

  return (
    <Card sx={{ p: 3, mt: 3 }}>
      <Title title={title} />
      <div id={elementId} style={{ width: "100%", height: "720px" }}></div>
    </Card>
  );
};
- Pass
entryandelementIdto theControlPanelcomponent in src/App.tsx where the route is registered.
<CustomRoutes>
  <Route
    path="/installcode"
    element={
      <ControlPanel
        key="Install Code"
        title="Install Code"
        entry="/livechat/campaign/installation/"
        elementId="comm100-controlpanel-install-code"
      />
    }
  />
  <Route
    path="/chatvolume"
    element={
      <ControlPanel
        key="Chat Volume"
        title="Chat Volume"
        entry="/reporting/livechat/chatvolume/chatvolumebytime/"
        elementId="comm100-controlpanel-chat-volume"
      />
    }
  />
</CustomRoutes>
- Add new menu in src/Layout/Menu.tsx:
<CMenuItem to="/chatvolume" label="Chat Volume" />
Next Steps
This way the installation code and the chat volume are successfully integrated into Vincall. You can integrate more Control Panel's pages into Vincall in the same way.
Next, you can learn the interaction between Comm100 and Vincall in Managing the Status Exclusion.