- 14 Jul 2022
- 5 Minutes to read
- Print
- DarkLight
Part 1: Preparation
- Updated on 14 Jul 2022
- 5 Minutes to read
- Print
- DarkLight
Introduction
Integrating Vincall into Comm100 enables you to easily access Vincall pages in the Agent Console and Control Panel. So you don't have to jump back and forth between the two systems.
Step-by-step Instructions
- Installing the Development Tools
- Running the Vincall Project
- Getting the Projects of Integraiton
- Creating a Comm100 Account
Installing the Development Tools
Git
Git is a free and open source distributed version control system designed to handle everything from small to very large projects with speed and efficiency.
We use Git as the version control system to manage all the source codes provided in this tutorial. You can use Git to retrieve the sample projects from Comm100 GitHub.
Please get Git from the official website https://git-scm.com and install it. To make sure you complete the installation properly, please run the below command to check.
git version
If the installation is successful, you can get the following information.

Visual Studio Code
Visual Studio Code is a lightweight but powerful source code editor which runs on your desktop and is available for Windows, macOS and Linux. It comes with built-in support for JavaScript, TypeScript and Node.js and has a rich ecosystem of extensions for other languages (such as C++, C#, Java, Python, PHP, Go) and runtimes (such as .NET and Unity)
Throughout tutorial we use VS Code to edit the code.
To get and install Visual Studio Code, please refer to https://code.visualstudio.com. To learn how to use VS code here.
Node JS
Node.js is a JavaScript runtime built on Chrome's V8 JavaScript engine. We use it for the development and build of frontend projects.
You can get Node.js from https://nodejs.org.
After you complete the installation of Node.js you can use the following commands to confirm that the installation was successful.
node -v
npm -v

.NET
.NET is a free, cross-platform, open source developer platform for building many different types of applications.
We write .NET apps in C# language. C# is a simple, modern, object-oriented, and type-safe programming language.
We use .NET 3.1 to build the app. You can the .NET 3.1 from here.
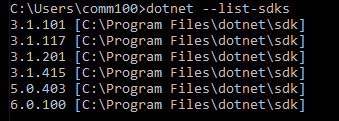
After your installation is complete, you can use the following command to confirm that the .NET 3.1 SDK was successfully installed to your computer.
dotnet --list-sdks

Running the Vincall Projects
In order to integrate Vincall into the Comm100, you need to download and compile the following three projects, to run the Vincall project itself.
- Vincall Portal Project
- Vincall Service Project
- Vincall OAuth Project
See detail in Vincall Introduction.
Getting the Projects of Integration
In order to properly use Vincall and integrate Comm100, you need to download and compile the following three projects:
Vincall App Project
This project is for the development of the Comm100 app. We can extend the Agent Console and Control Panel through the Comm100 app. Pages in src/pages are developed using React. Our UI component libraries are @comm100/framework and @comm100/styledComponents which are based on Material UI.
Here is a brief description of the project directory:
src
  ├─assets
  │  ├─manifest.json  # App manifest.json file.
  │  ├─getAccessToken.html # The page visited when the login was successful.
  │  └─vincallCallback.html # The page visited when logining to Vincall successfully.
  ├─components # Directory for React UI component.
  ├─CSS
  ├─domains
  │  └─bo # Typescript type for api business object.
  ├─pages
  │  ├─integration # The app setting page.
  │  ├─callPanel # Agent Console nav bar widget page.
  │  └─phone # Agent Console top bar widget page.
  └─styledComponents # Styled React UI component.
Clone vincall-app repository on your computer install dependencies using:
git clone https://github.com/Comm100/vincall-app.git
cd vincall-app
npm install
Config the domain in src/config.ts:
export const apiDomain = "{Vincall_API_Domain}";

export const defaultSiteId = "10000";

export const oauthDomain = "{Vincall_OAuth_Domain}";

export const vincallDomain = "{Vincall_Domain}";
Config the API proxy rule for develop server in proxyRules.js:
const targetDomain = "{Vincall_API_Domain}";
Run npm run serve to start the develop server.
Vincall Integration Project
Vincall Integration is a backend project based on dotnetcore3.1. It builds the interfaces to connect vincall and Comm100, including vincall backend JwtSignIn service、vincall backend oauth2 callback service and agent mapping service.
- Clone vincall-integration repository on your computer, install dependencies using:
git clone https://github.com/Comm100/vincall-integration.git
Then if you want to run the project, go to the directory VincallIntegration/VincallIntegration.Service/VincallIntegration.Service.
cd VincallIntegration/VincallIntegration.Service/VincallIntegration.Service
dotnet run
You can call http://localhost:5001/swagger/index.html to check if the service is running.
- Modify appsettings.json
The configuration items of the project are as follows and can be modified according to the actual situation.
{
  "ConnectionStrings": {
    "Vincall": "Server=localhost;User=sa;Password=sa;Database=vincall"
  },
  "InitDB": "false",
  "Logging": {
    "LogLevel": {
      "Default": "Information",
      "Microsoft": "Warning",
      "Microsoft.Hosting.Lifetime": "Information"
    }
  },
  "OauthUri": "https://oauth.vincall.net",
  "TokenPrivateKey": "MIIFHDBOBgkqhkiG9w0***=="
}
- ConnectionStrings: The connection string to Microsoft SQL server database.
- InitDB: Whether to recreate the database table structure and initialize the population of data. If the data table structure has already been initialized, it will not be modified again.
- Logging: The definition and type of the log output are changed
- OauthUri: Vincall's OAuth 2 service address.
- TokenPrivateKey: Private key ciphertext required for token issuance.
If you are initializing for the first time, you will need to prepare the MS SQL Server environment. Once you have the database environment ready, you can change the ConnectionString Authdb key and InitDB key.
 "ConnectionStrings": {
    "AuthDB": "Server=[your ip];User=[your username];Password=[your passwor];Database=vincall"
  },
  "InitDB": "true",
- Run the program by the following command.
dotnet run
Finally, Let's check database when opening Microsoft SQL server management studio.
Creating a Comm100 Account
Before we can start everything, we first need to have a Comm100 account. There are two ways you can get a Comm100 account.
Signing up for a free trial
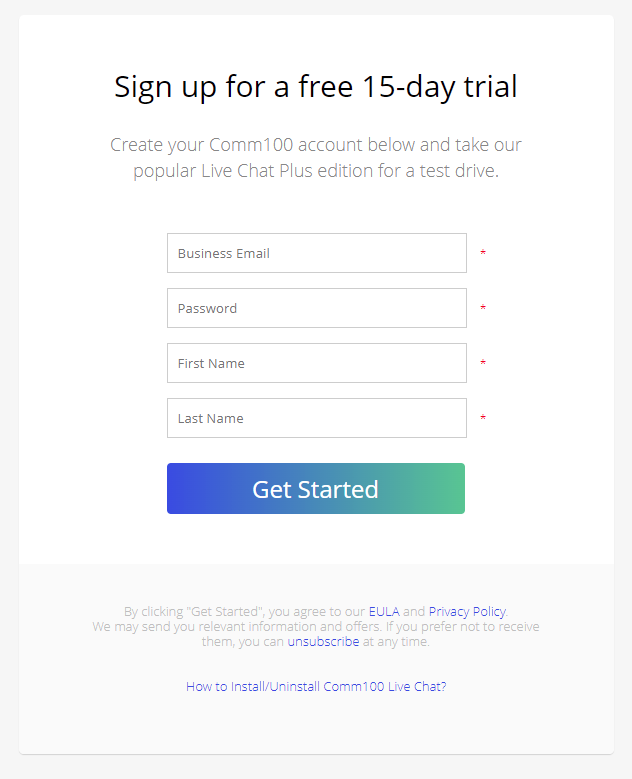
- Open the Comm100 Sign Up and enter your basic information then click the Get Started button. Wait a few seconds and you will have a Comm100 account.

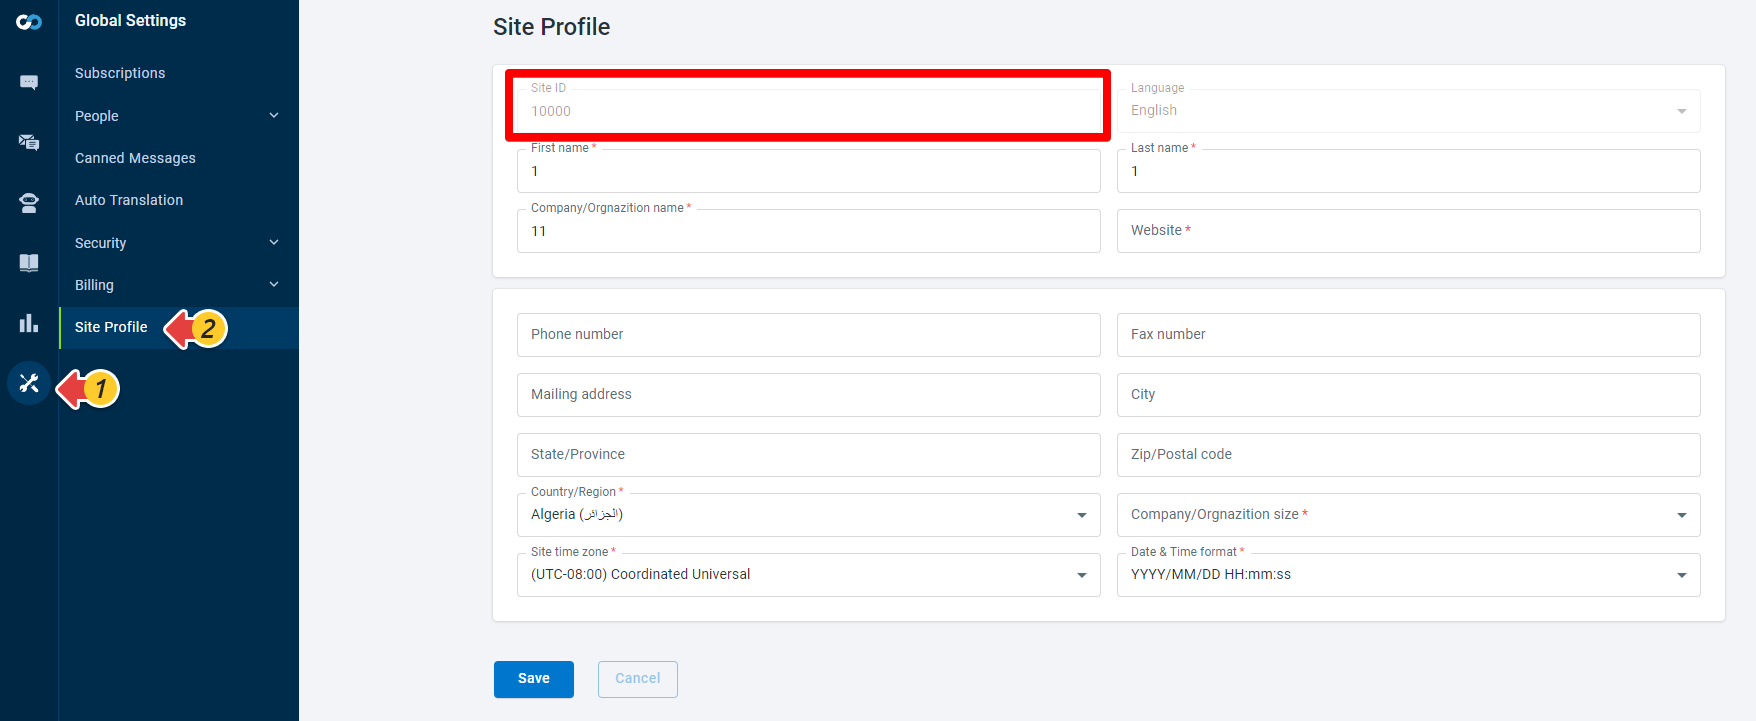
- After create an account, you can login to the account and go to the Global Settings >> Site Profile to get the
{site_id}like 10100000 as shown in the image below. We will use this value in later steps.

- When filling in the basic information of registration, you enter an email address, the system will use the email to create a corresponding agent. We will record the email as
{agent_email}, we will also use it in the next steps.
Contacting Comm100 to create an account
Open the Comm100 website to contact Comm100 Support to create an account.
Next Steps
In this article, we learned how to configure the development environment, download the required projects, compile and run, and how to create a comm100 account and integrate Vincall. In the next chapter, we will introduce how to setting up the app.

