Comm100’s Chatbot allows your customers to interact with a Chatbot to receive information about products or services quickly and efficiently.
However, you may need to extend the capabilities of our Chatbot by connecting it to your own database for more personalized and dedicated service.
Now, with the latest update, our Chatbot can send data to your own web application using a “Webhook”. A Webhook is a custom web callback query used to provide real-time information.
To set up these new personalized questions, you can supply Chatbot with a URL of the web application to receive the Webhook data and return the relevant information to our Chatbot service.
Step by Step Instructions
-
Log in to your Comm100 account.
-
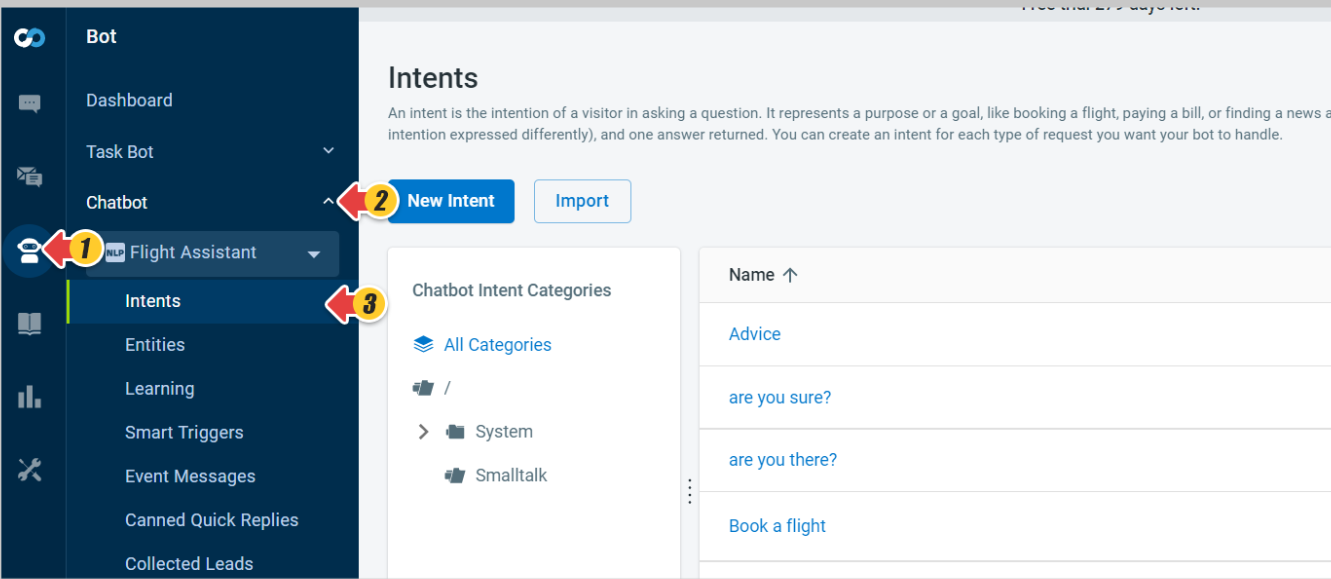
From the left navigation menu, go to Bot > Chatbot.
-
Select a Chatbot from the drop-down list, and go to Intents.
-
Click New Intent or edit an existing Intent.
Here, we choose to edit an existing Intent.
The Edit Intent page appears. -
Drag the Trigger a webhook action card to the flow builder area.
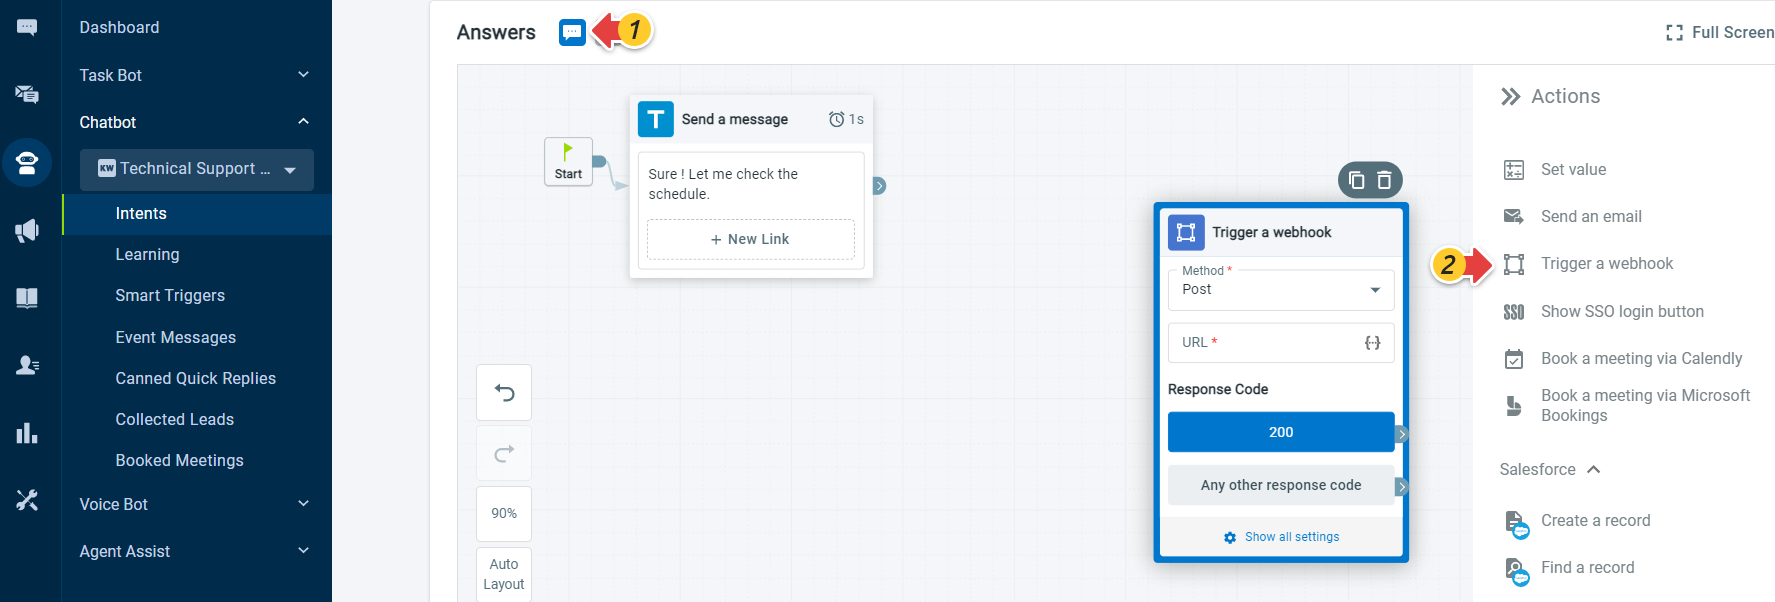
-
Finally, select the POST method and enter the URL for your web application to receive chat data.
Webhook Settings
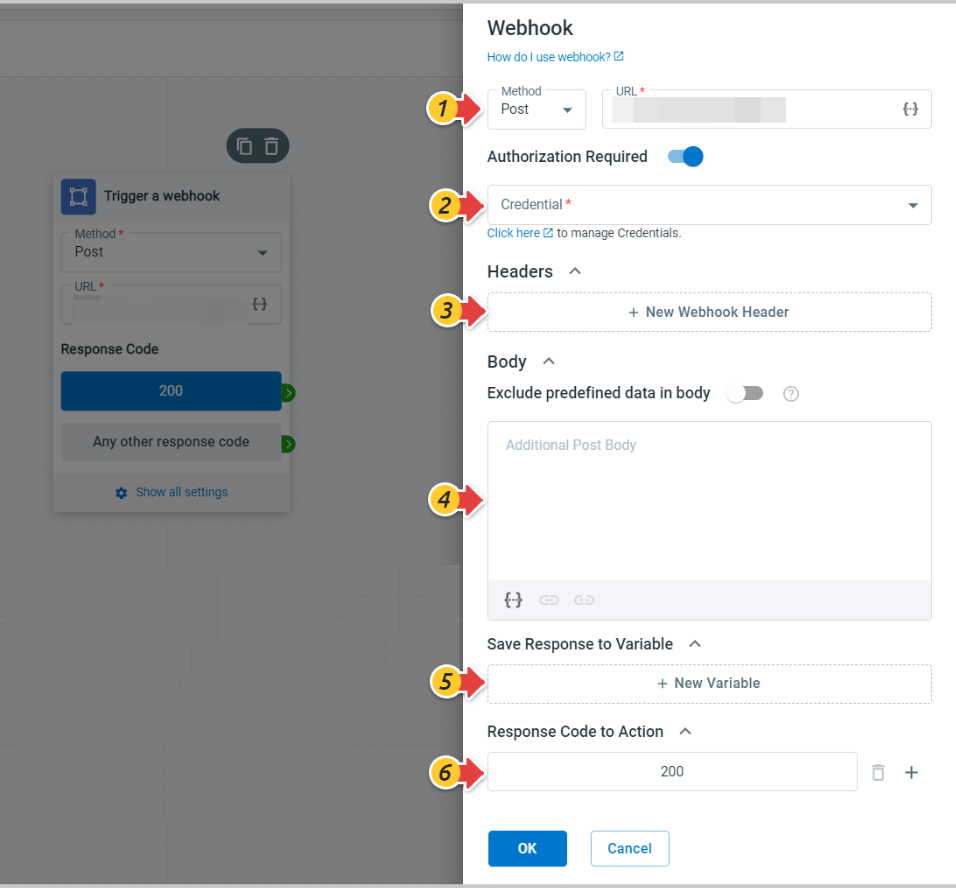
You can click the Show all settings link on the Trigger a webhook card to further customize the webhook settings. The Webhook drawer appears where you can do the following:
- Edit POST or GET method of webhook URL.
- Turn on the Authorization Required toggle and select the authorization credential.
- Add webhook header.
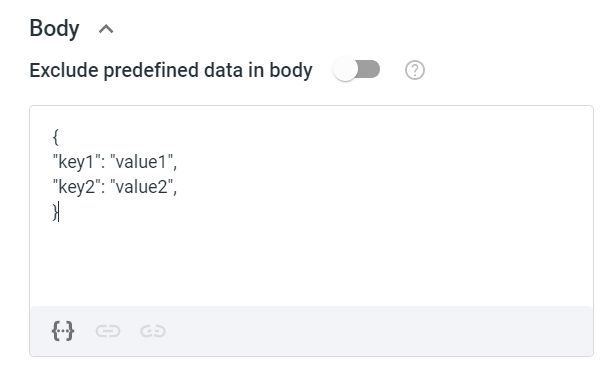
- Add Additional Post Body JSON. In case you want to exclude the default pre-defined data in webhook body, turn on the Exclude predefined data in body toggle key.
- Add variable to save the webhook response.
- Input response code to action.
- Click OK.
Data Sent to Your Web Application
Through the designated URL, your web application will receive the variables and their values from the chat sessions. The data that will be passed to your web application will include the “Fields” in the Pre-chat Window, Custom Variables, Variable of Visitors, Last Message from Visitors, and Matched Intents.
Your web application will then process the received data, generate and send us the result.
Your Additional Post Body JSON will append to post object.
Below is an example of the data in JSON format that will be sent to your server with your Additional Post Body :
  {
	"event": "questionAsked",
	"question": "Continue",
    "originalQuestion": "Continue",
    "isTranslated": false,
	"channel": "Live Chat",
	"chatId": "f16dde4f-ec6a-4102-badb-09ed7bb5725e",
	"botId": "cdf2da6b-2cc4-4c1d-a3c3-83d5dc8fc7f2",
	"visitorId": "5e6567ae-1e2d-46da-bd68-43139ee9316f",
	"campaignId": "c30464bc-73c7-41fb-8a65-42d2d650a722",
	"visitorInfo": {
		"visitorGuid": "5e6567ae-1e2d-46da-bd68-43139ee9316f",
		"longitude": 0.0,
		"latitude": 0.0,
		"pageViews": 1,
		"browser": "Firefox 102.0",
		"chats": 12,
		"city": "",
		"company": "",
		"country": "Hong Kong",
		"currentBrowsing": "https://dash11.comm100.io/frontEnd/assets/livechat/previewpage/?campaignId=c30464bc-73c7-41fb-8a65-42d2d650a722&siteId=10100749&lang=en",
		"customFields": [],
		"customVariables": [],
		"department": "00000001-0000-0000-0000-000000000001",
		"email": "",
		"firstVisitTime": "2022-07-20T06:57:14.585Z",
		"flashVersion": "",
		"ip": "45.123.194.216",
		"keywords": "",
		"landingPage": "https://dash11.comm100.io/frontEnd/assets/livechat/previewpage/?campaignId=c30464bc-73c7-41fb-8a65-42d2d650a722&siteId=10100749&lang=en",
		"language": "en-GB",
		"name": "SSOUser_elia",
		"operatingSystem": "Windows 10",
		"phone": "",
		"productService": "",
		"ticketId": "",
		"referrerUrl": "",
		"screenResolution": "1920x1080",
		"searchEngine": "",
		"state": "",
		"status": 2,
		"timeZone": "GMT +08:00",
		"visitTime": "2022-07-20T06:57:13.8698464Z",
		"visits": 1,
		"ssoId": "elia",
		"chatRequestingPageUrl": "https://dash11.comm100.io/frontEnd/assets/livechat/previewpage/?campaignId=c30464bc-73c7-41fb-8a65-42d2d650a722&siteId=10100749&lang=en",
		"segments": [],
		"campaignId": "c30464bc-73c7-41fb-8a65-42d2d650a722",
		"channelAccountId": "00000000-0000-0000-0000-000000000000",
		"timeOnWebSite": 3073,
		"timeOnCurrentPage": 1911,
		"isAgentOnline": false
	},
	"intentId": "cb088eb3-7583-4b46-a09a-b098fc380b53",
	"intentName": "LostCard Form",
	"previousIntentId": "50d5d3d8-4a2c-4f9e-af63-f0574822dfe2",
	"previousIntentName": "Lost/Stolen Card",
	"variables": {
		"{!Variable.Name}": "Cici.",
         "{!Custom Variable.Color}": "Red",
        "{!Pre-Chat.Email}": "abc@sina.com"
	},
    "key1": "Value1", --from your additional Post Body JSON
    "key2": "Value2", --from your additional Post Body JSON
}
If turn on the Exclude predefined data in body toggle key. The post body is the value from your Additional Post Body input

Below is an example of the data in JSON format that will be sent to your server with Exclude predefined data enabled :
{
    "key1": "Value1",
    "key2": "Value2",
}
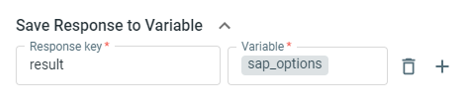
Save Your Response to Variable
You can save the response to Variable, and the Variable can be used after the webhook called.
For example
Your response is
{
    "code": 1,
    "result": ["SAP Option1","SAP Option2","SAP Option3"]
}
You can save the "result" to Variable "sap_options"
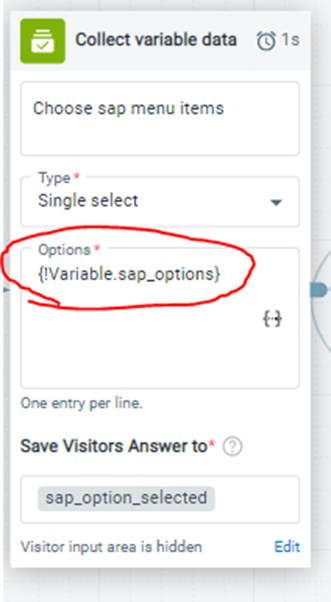
You can use the Variable "sap_options" like this to show the options:
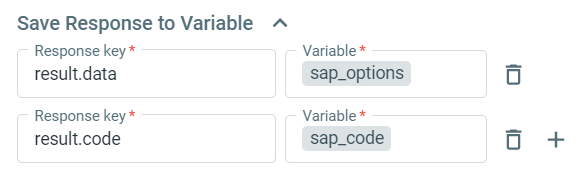
If your response structure is complex ,For example your response is
{
    "result":
     {
        "code": 1,
        "data": ["SAP Option1","SAP Option2","SAP Option3"]
    }
}
You can use "result.data" to get the array value, and save it to Variable like this: